How to Floss Your Teeth
Brushing reaches the surfaces of your teeth — but not the spaces between them. This guide covers the correct technique for how to floss your teeth, the right products to use, and how to adapt your routine if you have braces, implants, or veneers.
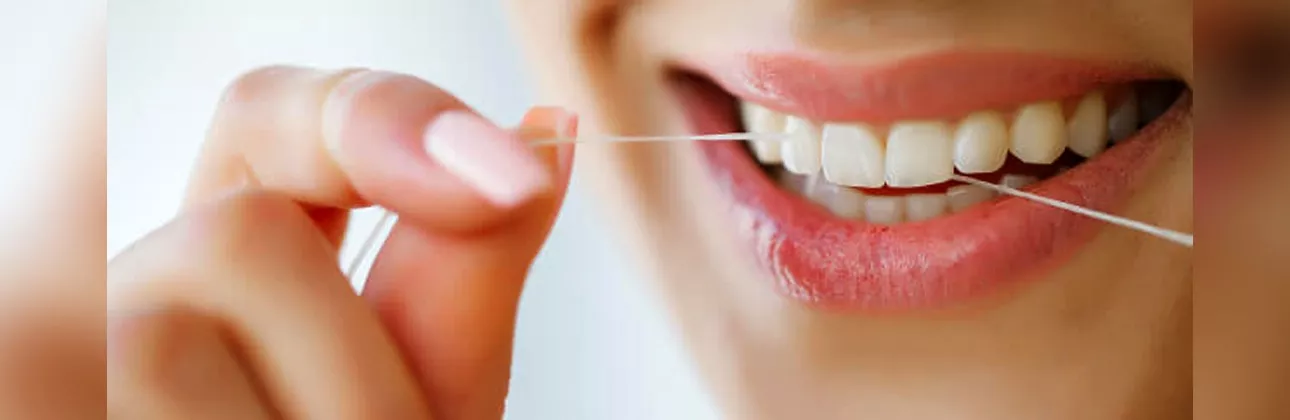
Why Flossing Matters for Your Oral Health
Understanding how to floss your teeth consistently makes a measurable difference to long-term gum and enamel health. Interdental spaces are among the most common sites for early decay and gum inflammation.
Food debris and bacterial film settle between teeth where bristles cannot reach. Over time, this leads to the gradual breakdown of enamel at contact points and inflammation at the gum margin — the early stage of gum disease prevention Istanbul.
A consistent flossing guide is not about achieving a clinical standard — it is about removing the material that brushing misses before it has a chance to mineralise into tartar. Once tartar forms, it cannot be removed at home; a professional cleaning appointment becomes necessary.
Regular interdental cleaning also supports fresh breath. Much of the odour associated with poor oral hygiene originates from bacteria between the teeth — flossing correctly addresses the source. If you struggle with persistent odour, our guide on flossing eliminates bad breath covers the connection in more detail.
How to Floss Your Teeth Properly: Step-by-Step
Learning how to floss your teeth properly takes a little practice, but the dental flossing technique becomes natural within a few weeks. The correct sequence is as follows.
-
1Cut an appropriate length Around 40–45 cm of floss. Wind most of it around the middle finger of one hand and the remainder around the same finger on the other hand, leaving 3–5 cm of working floss between them.
-
2Hold firmly Pinch the working section between your thumbs and index fingers, leaving about 2–3 cm taut between them.
-
3Guide gently Slide the floss between two teeth using a gentle zigzag motion. Do not snap it into the gum tissue.
-
4Curve around each tooth Once between the teeth, curve the floss into a C-shape around one tooth and slide it gently up and down against the tooth surface, going just below the gum line.
-
5Repeat for the adjacent tooth Use the same motion on the neighbouring tooth before moving to the next gap.
-
6Advance to a clean section Unwind a fresh section of floss for each new gap. Reusing the same section transfers bacteria rather than removing it.
-
7Work systematically Start at the same point each time and move around the arch in order, so no gaps are skipped.
Following these steps consistently is what makes the difference when learning how to floss your teeth properly. The way you guide the floss and curve it around each tooth surface matters far more than the brand or product you choose. After flossing, rinse with water or mouthwash to clear the loosened debris.
Choosing the Right Type of Dental Floss
The correct flossing technique matters more than the product you use, but choosing the right floss makes how to floss your teeth a sustainable daily habit. When learning how to use dental floss for the first time, waxed varieties are often easier to handle.
Waxed Floss
Slides more smoothly between tight contact points and is less likely to shred. A reliable choice for most patients with naturally tight interdental spaces.
Unwaxed Floss
Produces a slight squeaking sound when the tooth surface is clean — some patients find this a useful indicator of thorough cleaning.
Dental Tape
Broader and flatter than standard floss. Covers a larger surface area per stroke and is often preferred by patients with wider interdental spaces.
Floss Picks & Interdental Brushes
Convenient for patients who find conventional flossing difficult — useful for limited dexterity, fixed retainers, or bridge restorations.
Whichever product you use, the goal is the same: consistent removal of the bacterial film from all interdental surfaces.
Flossing with Braces, Implants, and Veneers
The dental flossing technique requires some adaptation depending on your dental work. Knowing how to floss your teeth around restorations and appliances is important for protecting them long-term.
Braces
The wire running along the arch prevents floss from being threaded directly between teeth. A floss threader — a stiff loop that guides floss beneath the wire — allows you to reach the gum line around each bracket. Orthodontic floss, which has a stiffened tip, achieves the same result without a separate tool. Water flossers are also widely used alongside conventional floss during orthodontic treatment.
Implants
Flossing around implants is essential. Bacterial accumulation at the implant-gum junction can lead to peri-implant inflammation — a condition that, if left unmanaged, affects the tissue supporting the implant. Use unwaxed floss or implant-specific floss, wrap it around the implant in a shoeshine motion, and clean the full circumference at the gum line. Our implant hygiene Istanbul page covers the full post-treatment care protocol.
Veneers
Floss as normal, but avoid snapping the floss into the gum with force. Guide it gently and slide out rather than pulling up through the contact point, which can place stress on the bonded margin.
Common Flossing Mistakes to Avoid
Understanding how to floss your teeth properly means recognising what to avoid as much as what to do. Even patients who floss regularly make small errors that reduce the effectiveness of their routine.
- Snapping the floss into the gum The most common mistake. Forcing floss through a tight contact can lacerate the gum tissue, causing bleeding and soreness. It does not clean more effectively — it simply causes unnecessary discomfort.
- Not curving around each tooth Dragging floss straight up and down between teeth without forming a C-shape against each tooth surface misses most of the area that needs to be cleaned.
- Using the same floss section throughout Transfers the bacteria removed from one gap to the next. Always advance to a fresh section for each space.
- Flossing too infrequently Dental plaque begins to reform within hours of cleaning. Once a day — typically before bed — is the standard recommendation for most patients.
- Stopping because of gum bleeding In most cases, bleeding during the first one to two weeks reflects inflamed tissue that hasn't been cleaned consistently before. With regular practice of how to floss your teeth correctly, the inflammation typically resolves and bleeding stops. Making these adjustments turns how to floss your teeth properly from a task into a lasting daily routine.
How Often Should You Floss?
Once a day is the generally accepted guidance for most patients who want to floss their teeth effectively. Flossing before brushing in the evening allows your toothpaste to reach the newly cleaned interdental surfaces.
Patients with a higher susceptibility to decay, gum disease, or those undergoing orthodontic treatment may benefit from flossing after meals as well. Your dentist can advise on the frequency that best suits your individual situation.
If you find daily flossing difficult to maintain consistently, an interdental brush or water flosser guide Istanbul can serve as an effective alternative — particularly for wider spaces. These tools follow different mechanics to conventional floss but provide meaningful interdental cleaning as part of a structured home care routine.
Regular professional cleaning appointments remain important alongside home care. Flossing prevents the accumulation of plaque between visits, but it does not replace the removal of calcified deposits that can only be addressed clinically. If you have questions about your home care routine, our dental clinic in Istanbul is available for a consultation at any time.
Frequently Asked Questions
Is it normal for my gums to bleed when I floss?
Initial bleeding during the first one to two weeks of regular flossing is common and typically indicates mild inflammation caused by infrequent cleaning. As the gum tissue becomes healthier with consistent interdental cleaning tips applied daily, bleeding usually resolves. If bleeding persists beyond two weeks, a dental examination is advisable to assess gum health.
Can I use a water flosser instead of dental floss?
Water flossers are a valuable addition to a home care routine, particularly for patients with implants, braces, or limited dexterity. They are effective at disrupting and flushing bacterial film from interdental areas. For patients who find conventional flossing difficult, a water flosser can serve as a primary interdental cleaning tool. It is generally considered complementary to — rather than a complete replacement for — conventional flossing.
How do I know if I'm flossing correctly?
Correct flossing produces a slight resistance as you curve around each tooth surface. The floss should feel like it is moving against the tooth — not just passing through the gap. If you are not reaching below the gum line and curving the floss, you are likely missing the area where bacterial film accumulates most.
My floss keeps shredding between certain teeth. What should I do?
Shredding typically indicates either a rough contact point between adjacent teeth, an old filling with a worn edge, or early decay. Switching to a waxed floss is a reasonable first step. If shredding continues consistently in the same location, it is worth mentioning to your dentist at your next appointment, as it may indicate a surface that needs attention.
Should I floss before or after brushing?
Flossing before brushing is generally considered more effective. It loosens debris and disrupts the bacterial film between teeth, allowing toothpaste fluoride to reach the interdental surfaces more effectively during brushing. This principle applies whether you are learning how to floss your teeth for the first time or refining an existing habit.
How do I floss around a fixed bridge?
A bridge spans the gap where a tooth is missing, and the false tooth (pontic) sits against the gum. Standard floss cannot be threaded between the teeth as normal. Use a floss threader to guide floss beneath the bridge, then clean along the gum surface under the pontic and around each abutment tooth. This prevents bacterial accumulation beneath the restoration.
At what age should children start flossing?
Flossing should begin as soon as two adjacent teeth are in contact — this typically occurs from around age two to three. A parent or caregiver should carry out flossing until the child has the manual dexterity to do it independently, usually around age seven to eight. Your child's dentist can advise on the appropriate technique for how to floss your teeth at each stage of development.